Blade tension might sound like a small detail, but in band sawing, it’s one of the biggest factors that determines whether you get a clean, straight cut—or a frustrating, wavy mess. Think of blade tension like tuning a guitar string: too loose and it buzzes; too tight and it snaps. The right tension creates perfect harmony.
This article breaks down blade tension in simple, friendly language so you can understand it, set it correctly, and avoid costly mistakes.
What Is Blade Tension?
Blade tension refers to how much stretch or tightness is applied to a band saw blade. It’s measured in PSI (pounds per square inch) and determines how stable the blade remains while cutting.
A properly tensioned blade:
Cuts straighter
Vibrates less
Lasts longer
Produces cleaner finishes
Too much or too little tension? That’s when problems show up—blades break, drift, twist, or leave rough, uneven cuts.
Tip: Imagine trying to cut with a loose kitchen knife versus a firm one. One wobbles, the other slices clean. That’s blade tension in action.
Why Blade Tension Matters
Even with the best band saw and a premium blade, poor tensioning can ruin your results.
Common problems caused by incorrect tension:
Too tight:
Premature blade breakage
Twisting or cracking
Weld failure
Gullet cracks
Too loose:
Blade vibration
Wandering or “leading” in the cut
Belly-shaped cuts
Inaccurate or out-of-square edges
Tip: If your cuts look inconsistent, blade tension is almost always the first thing to check.
How to Set Blade Tension (The Right Way)
Different blades require different levels of tension. Here’s a simple guide:
1. Carbon Blades
Typical tension: 15,000–20,000 PSI
Best for general-purpose use, softer materials, and economical cutting.
2. Bi-Metal Blades
Required tension: Up to 35,000 PSI
Stronger, more durable, and perfect for metal cutting—but they demand more stretch.
Understanding PSI by Blade Size
PSI is about pressure—not total force. So larger blades require more force to reach the same PSI.
Example:
A ½” x .025 blade needs 312.5 lbs of force to reach 25,000 PSI
A 1” x .025 blade needs 625 lbs of force for the same PSI
Same PSI, double the thickness, double the force.
Tip: When changing blade widths, always reset tension. What works for one blade can't be assumed for another.
How to Measure Blade Tension
Not all machines handle blade tension the same way. Here are the most common methods:
1. Built-In Tension Gauge
Many modern band saws have a built-in scale or mark that indicates tension.
However…
These gauges often assume a specific blade size. Changing blade width? The reading may no longer be accurate.
Tip: Treat built-in gauges as a starting point—not gospel truth.
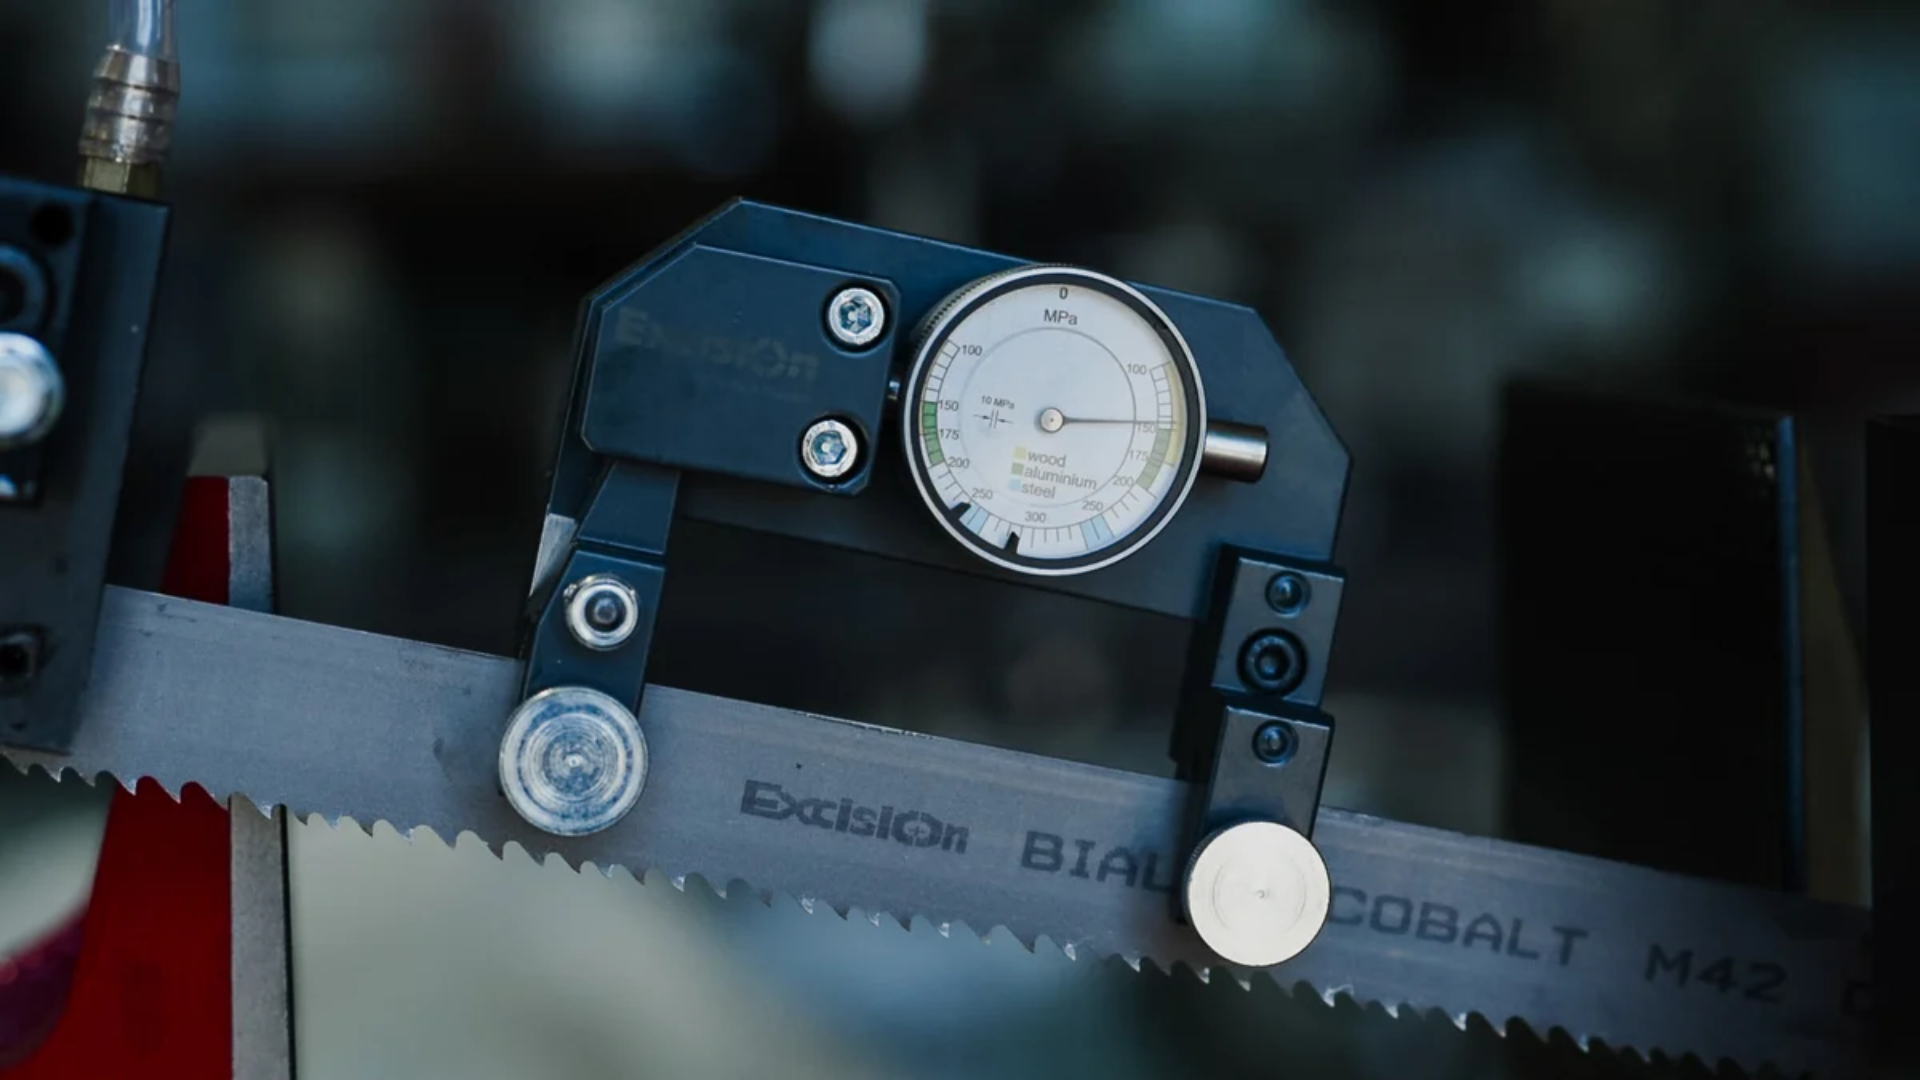
2. Blade Tension Meter
A handheld tension meter gives the most accurate reading across any blade size or type.
Shops that cut a lot of metal or use large blades rely on tension meters for consistency.
Tip: If precision is important in your operation, invest in a tension meter—it quickly pays for itself in blade life.
3. Counting Crank Turns (Rule of Thumb Method)
Experienced operators often rely on “feel” developed over time. After setting tension correctly a few times using a meter, you can remember:
How many crank turns = proper tension
How the blade sounds when plucked
How the machine behaves when tension is right
Tip: This method works only after a good calibration period. Don’t skip the learning phase.
4. Air Pressure Blade Tensioning
Some machines use an air cylinder to apply force. You simply:
Adjust the regulator
Match pressure to the manufacturer’s chart
Set tension accurately across different blade sizes
Air tensioning is especially useful for:
Large blades
High-precision jobs
Applications requiring consistent, repeatable settings
Tip: Always follow the pressure-to-force chart provided by the machine manufacturer.
Blade Tensioning Techniques & Best Practices
1. Use the Lowest Effective Tension
More tension does NOT equal better cutting.
The goal is the minimum tension that delivers straight, accurate cuts—without vibration or drift.
Tip: If the blade cuts straight and smoothly, resist the urge to increase tension “just in case.” More is not better.
2. Always De-Tension After Use
When cutting, a blade heats up and naturally stretches. If left under full tension after the job:
The blade can warp
The weld can weaken
The machine frame may suffer stress
Always release tension after each use.
Tip: Make de-tensioning part of your shutdown routine—just like switching off the coolant pump.
3. Warm-Up Stretch Matters
A cold blade behaves differently from a warm blade.
If you tension a blade cold to its maximum PSI, it may exceed safe limits once heated.
Tip: After the blade warms up a bit, recheck tension if your machine allows quick adjustments.
4. Watch for Signs of Incorrect Tension
Check for:
Wavy cuts
Excessive noise
Slow cutting
Frequent tooth stripping
Blade vibration
Burn marks on metal or wood
These are tension red flags.
Quick Step-by-Step: How to Set Blade Tension Properly
Install the blade correctly and check tracking
Slowly apply tension using your machine gauge or tension meter
Match PSI to blade type (carbon or bi-metal)
Make a short test cut
Listen for vibration or drift
Adjust tension slightly if needed
Begin production cutting
De-tension once the job is complete
Tip: Make test cuts part of your routine—two minutes of testing saves hours of rework.
Conclusion: Blade Tension Is the Foundation of Good Cutting
Blade tension isn’t complicated—once you understand it, it becomes one of the easiest ways to improve cut quality, extend blade life, and boost productivity.
By applying the right PSI, measuring it correctly, and using smart tensioning habits, anyone can operate a band saw safely and efficiently.